How I built this site
Nathan Yee • 2026-05-30Welcome to my new personal site! This blog is a place for me to share thoughts on software architecture, interesting projects, open-source software, and reviews of courses and books that I found meaningful. I’ll also use this space to document cool and interesting things I learned along the way.
For this first post, I thought it would be fitting to go over the trials and tribulations that I went through to get this page set up.
Motivations
I wanted a place to call home for my body of work. I am heavily inspired by other personal blogs such as Yxlow’s knowledge dump and Lei Mao’s Log Book for the depth of information they share about their areas of interest.
Some History
This is not my first attempt at creating a personal webpage. I am unfortunately a bit too young to have been developing during the Angelfire and Geocities era, my first sites were created in 2012 when I was in the fourth grade. My first-ever website (and first thing I ever coded) is pictured below:
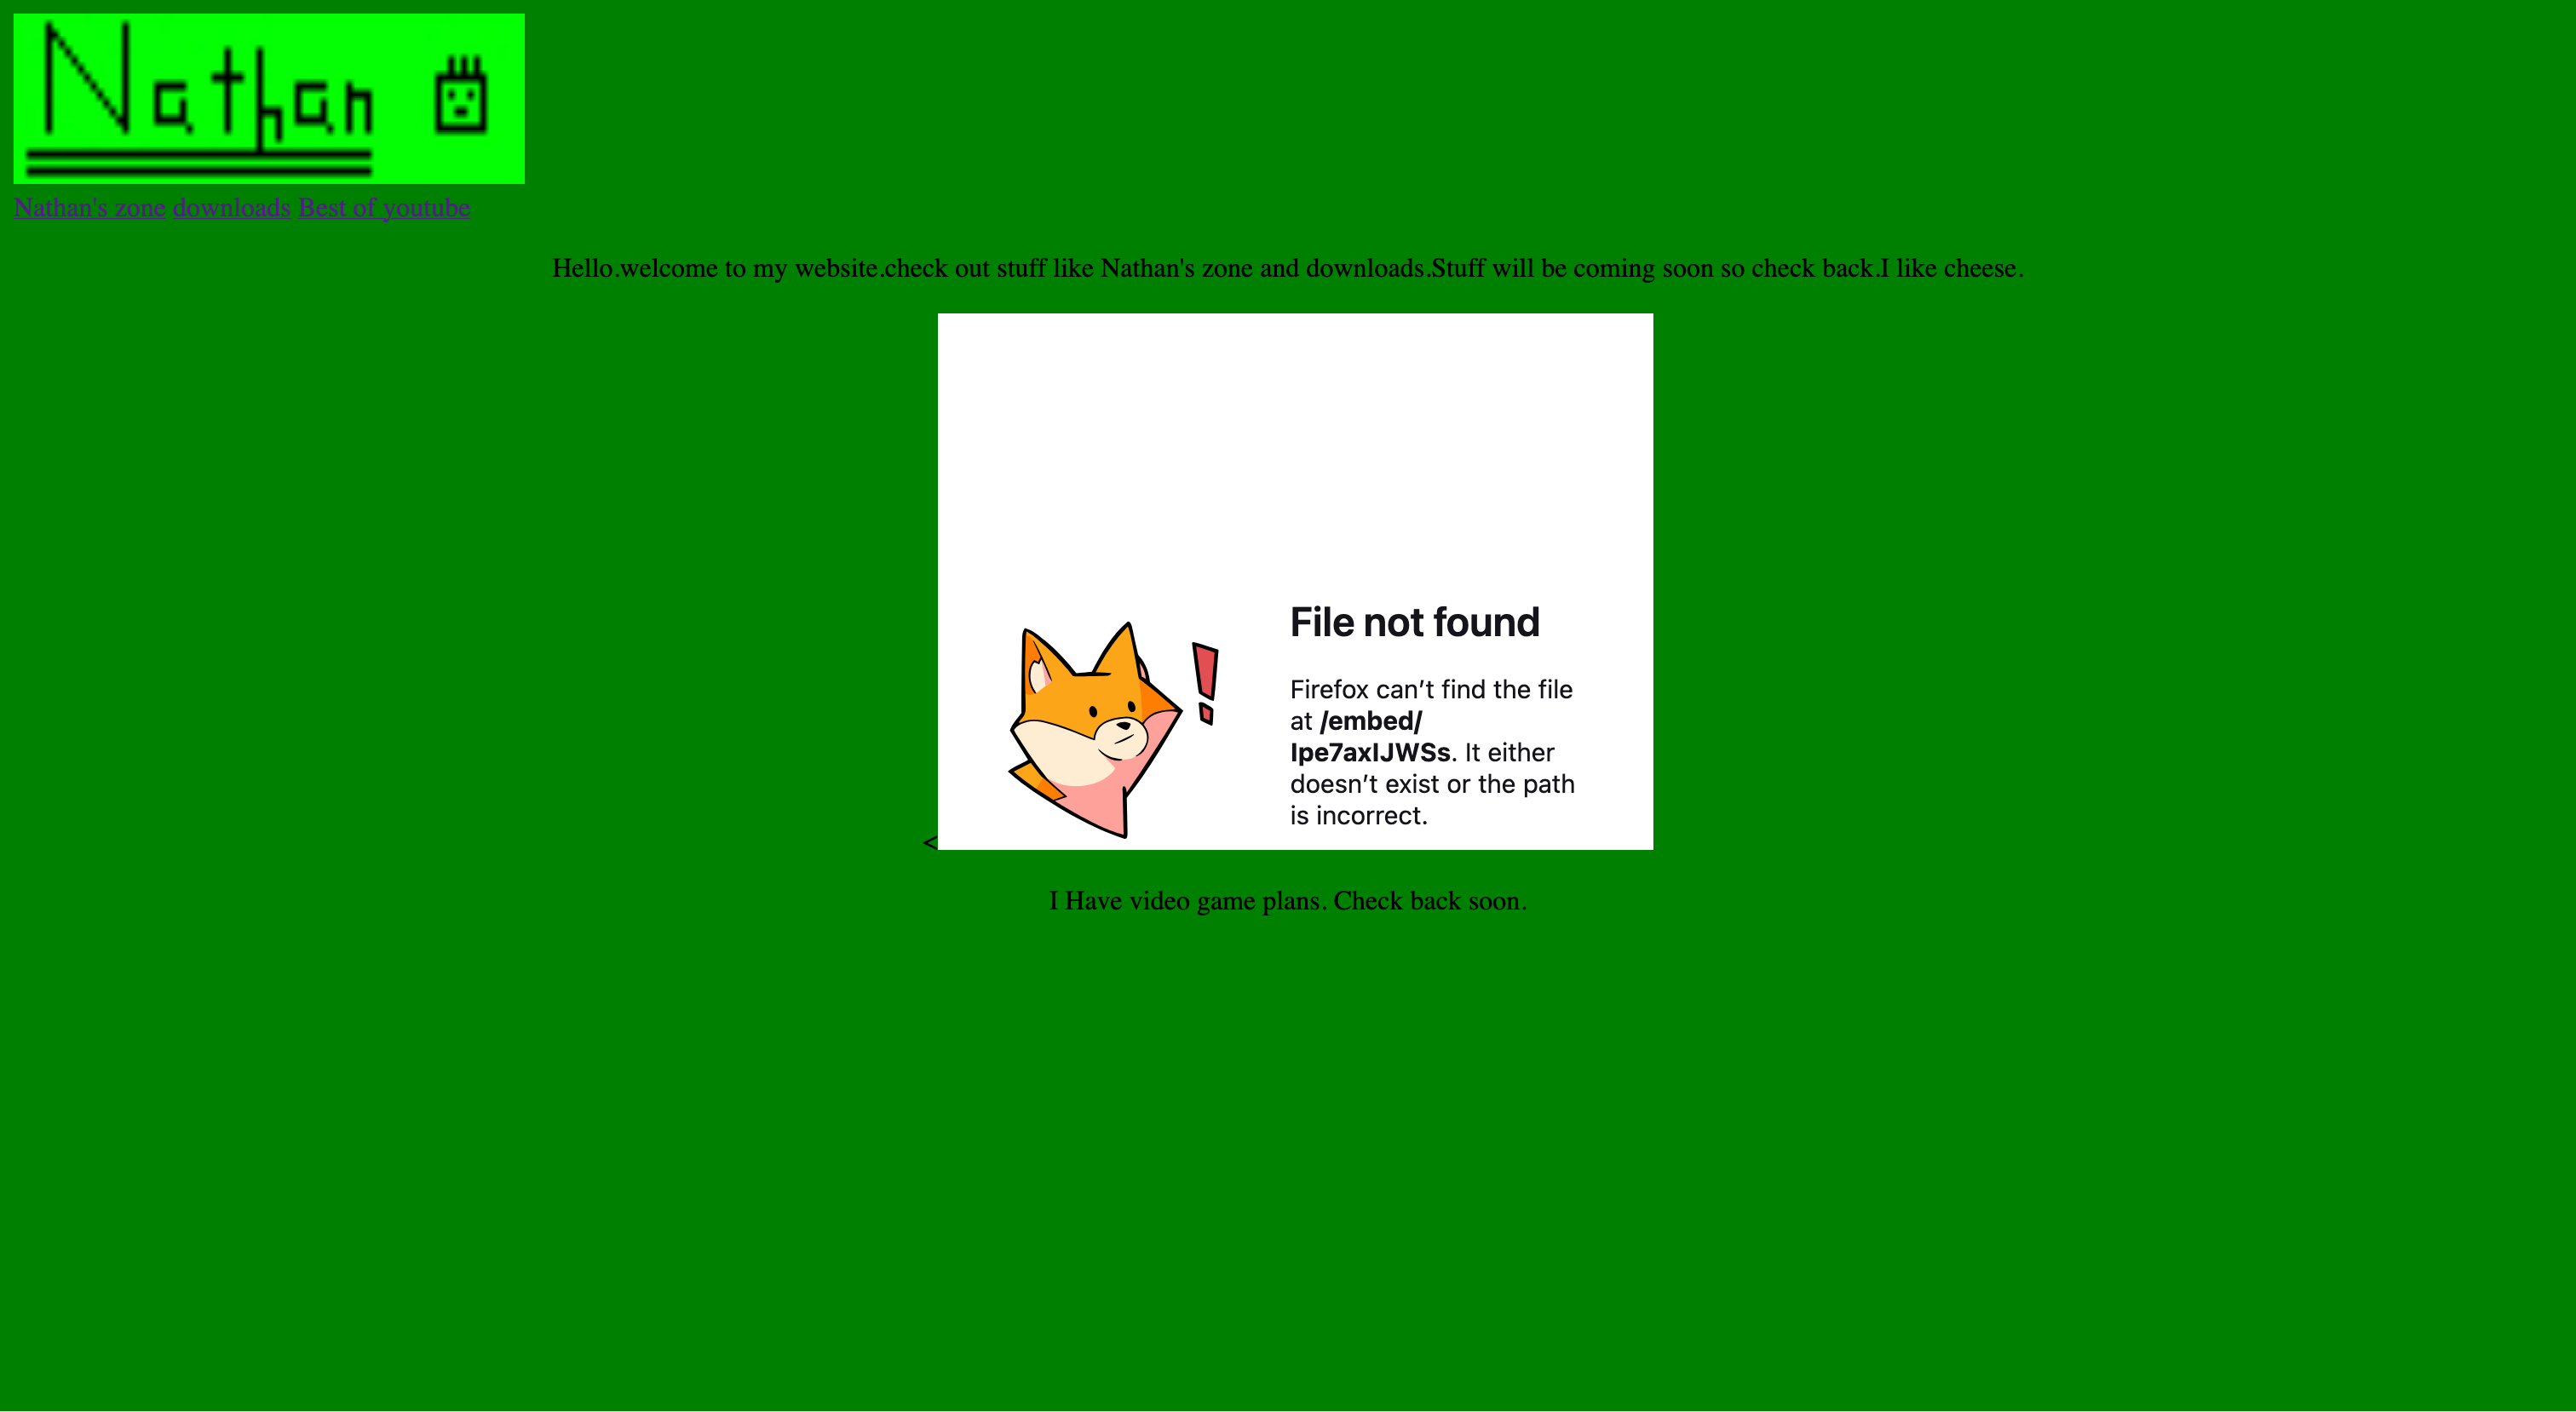
Back then, I utilized Dropbox to host the site, and used free .tk domain names from Freenom. This was a completely free way to host a website with a legitimate domain name, which was especially important as a kid with no access to funds. Unfortunately, Dropbox discontinued HTML content rendering from the public folder in 2016. Freenom also halted free domain registrations as they were commonly used for scamming so this method has been lost to time.
In high school, I made an updated site using React, React Router, and hosted on Github Pages to showcase my engineering projects. This site had some cool 3D animations and layouts, but was a hassle to update. Since it was a single-page application, it wasn’t indexed properly by search engines either. Over time, the site grew outdated and I decided to archive the project.
Because of this, I have been site-less throughout my college and early career years.
Goals
Before getting started, I had a few goals for the site based on my past experiences.
Keep the Stack Maintainable
I did not want to spend time fiddling with frontend development. The ecosystem moves too quickly and every few months there seems to be no clear direction on a definititive framework or styling solution with a consistent API. For this site, I wanted to keep dependencies to a minimum and avoid things like Tailwind or large component libraries.
Creating new posts should also be easy. I wanted to avoid creating new HTML files or Javascript objects and write in Markdown with support for extras like Mermaid diagrams. CI/CD was another requirement so new posts could be automatically built and deployed.
Keep the Site Simple
I wanted the site to be as minimal and lightweight as possible for readers and be as close to a web 1.0 page as possible with simple static pages. I have grown to hate excessive animations, pop-ins, and client-side rendering. Because of this, I wanted to avoid single-page applications, dynamic routing, popups, and tracking scripts. However, I do want to keep modern niceties like mobile-friendly responsive layouts and dark mode support.
Keep Costs Low
I have no plans to monetize this site, so I wanted to minimize the amount it cost to keep this site running. Outside of domain name registration costs, I did not want any additional costs and to utilize free tiers as much as possible. The site should be statically generated at build time and require no server-side processing after deployment, which keeps both the architecture and hosting costs simple.
Setup
For this site, I decided to build using the Jekyll static site generator. Jekyll meets my needs as it is mostly a configuration-based project with Jinja-like templating, which makes it easy to define repeatable static assets. It is my first time working with a Ruby-based project. Thankfully the amount of code needed for Jekyll is very minimal and it seems well supported by a variety of static site hosts such as GitHub Pages and Cloudflare Pages.
I utilized the brutalist-blog theme from andrewhwanpark. I like this theme a lot because it is extremely simple and easy to edit. It is built with Bootstrap, comes with dark mode support, and is content-first without unnecessary sidebars or images which meets my goals for simplicity.
Development Containers
I enjoyed working with development containers (devcontainers) during my work on the Guidance for Game Analytics Pipeline on AWS and decided to reuse them for this website. Devcontainers greatly simplify dependency management, improve developer environment portability, and isolate from dependencies installed on my main system. The setup is pretty simple, simply create a json file at devcontainer/devcontainer.json:
{
    "name": "Jekyll Dev Container",
	"image": "mcr.microsoft.com/devcontainers/jekyll",
	"remoteUser": "vscode",
	"postCreateCommand": "bundle install"
}
When the repository is opened in Visual Studio Code and the devcontainers extension is installed, a popup will appear asking to reopen the repository in devcontainers. The extension will build the image, map the repository to the container file system, install dependencies (configured using the postCreateCommand), and handle port forwarding for development webservers. Pretty cool!
Edits to the Template
Tags
The original template did not come with tags, but I wanted to add them as a way to categorize my posts. Thankfully tags are already built-in to Jekyll as a tags list field in the front matter. I created a tags.md site to organize my posts by tags. Thankfully they are organized in a very structured way to easily iterate through.
{% assign tags = site.tags | sort %}
{% for tag in tags %}
  {{ tag[0] }}
  {% for post in tag[1] %}
    {{ post.title }}
  {% endfor %}
{% endfor %}
Unfortunately the tags page does not currently support linking to a specific tag dropdown. I will revisit the layout as the site grows and maybe add subpages for each tag if the number of posts gets too unruly.
Mermaid Diagrams
The next edit I wanted to make was Mermaid diagram support. I wanted Mermaid diagrams as an easy way to express flow charts without having to open up a graphics editor. My first choice was to try jekyll-diagrams, but unfortunately it has some dependencies on NPM which makes it hard to automate builds and has not been updated in 6 years.
Thankfully, I came across this awesome 2025 blog from Stuff… And Things… that went over how to add Mermaid diagrams to Jekyll. The steps were pretty straight forward, the only change I made was to make the head.html edit in default.html instead due to differences in the way the templates were set up.
Now I can create cool diagrams like this!
flowchart LR
    A["Create _includes/mermaid.html"]
    B["Edit head in _layouts/default.html"]
    C["Set mermaid: true in post front matter"]
    D["Mermaid diagrams render"]

    A --> B
    B --> C
    C --> D
Getting the Domain Name
The domain name https://natey.ee utilizes the .ee ccTLD for Estonia. I wanted to use this domain to do domain hacking with my last name and the domain is advertised as available for anyone to register. Unfortunately, the domain requires a lengthy authentication process that changed recently.
I originally chose zone.ee as my registrar as some of their documentation (although I admittedly didn’t check the date) indicated that paying using a PayPal verified account was a way to verify my identity. The message to authorize using PayPal was still displayed on the checkout page as well. Unfortunately, I was not aware that the system was changed until after I had paid and was prompted with a document verification page that did not have any inputs for my country.
After reaching out to support, they provided an eeID link to verify. The eeID system was very fickle. The name on my ID had to match the name I registered with exactly including capitalization and middle name (which was listed as my first name for some reason).
After several back and fourth messages with the zone.ee support, I was thankfully able to set up and authenticate myself as owner of the domain. Shout out to the support team, despite the lengthy process I would definitely recommend them for any future .ee domain registrations.
Deployment
To deploy and host the site, I decided to use Cloudflare Pages due to their generous free tier, free SSL and CDN, as well as easy integration with Github and Jekyll1. Deploying the site was as simple as following their setup documentation for Jekyll, the build was already pre-configured and minimal configuration was needed.
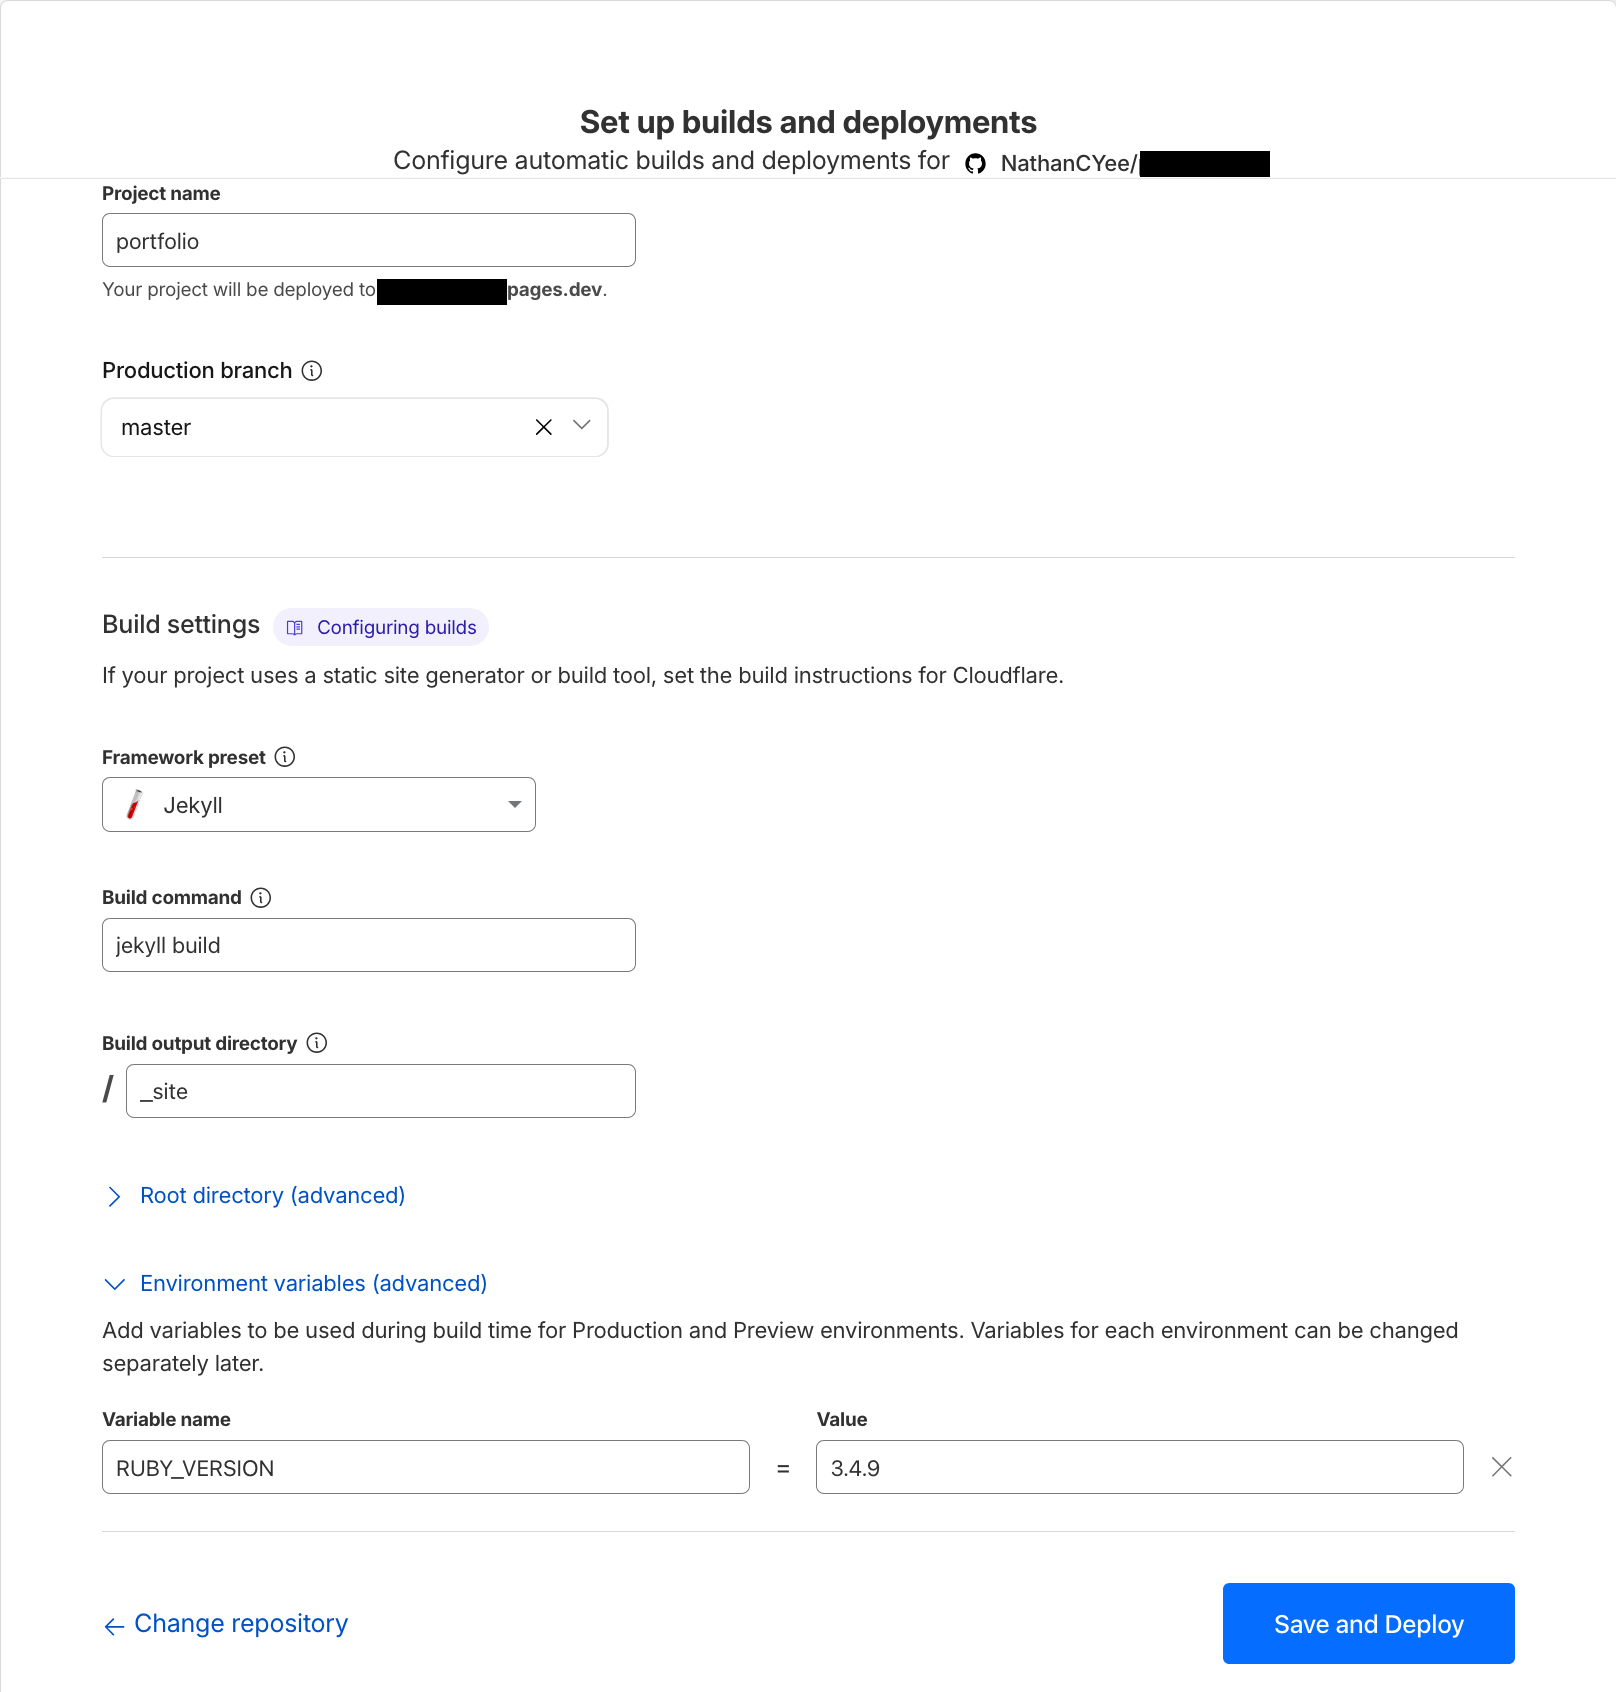
After configuring the site, Cloudflare ran a test build and deploy which went successfully.
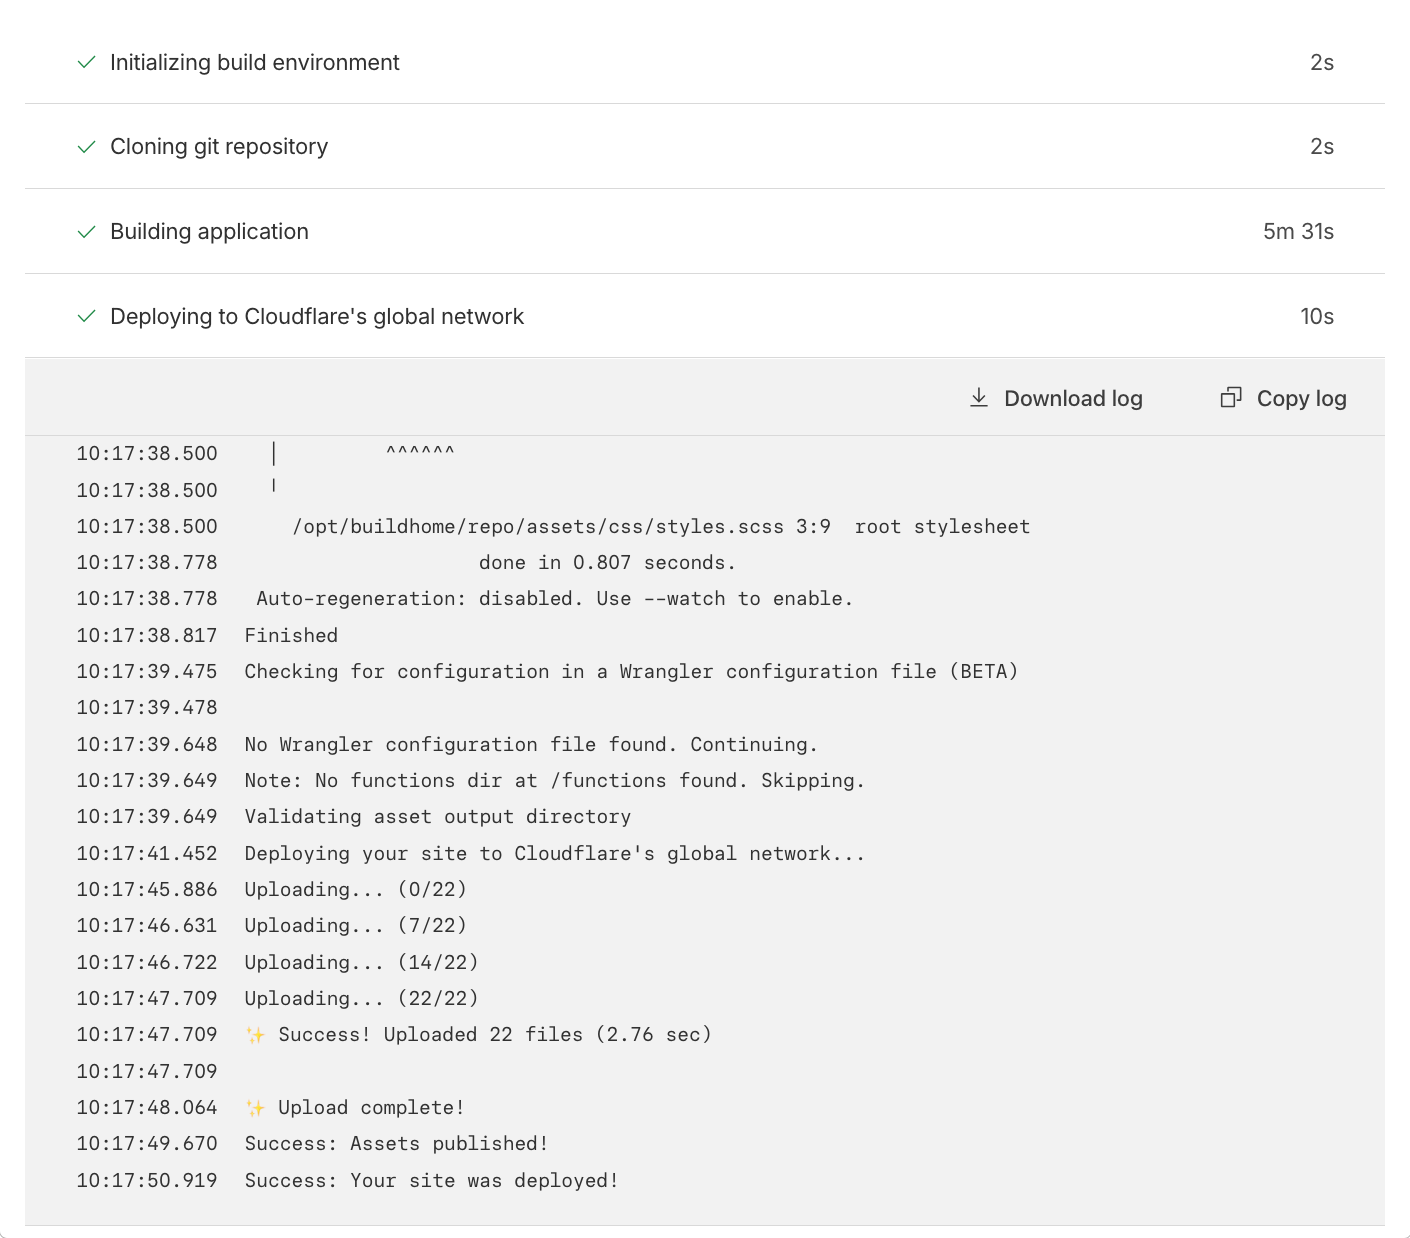
After the build and deploy was complete, the site was visible at an auto-generated domain name for the project. The Github repository was configured with an application that automatically ran on every new commit to trigger a new build.

After that, I connected my ee domain as a custom domain for the project and used Cloudflare nameservers.
Conclusion
All that leads to get the site up and running that you are here on today. The design of this site meets my goals for simplicity, maintainability, and cost. My total costs to run this site are €8.37 per year (approx $9.76 USD at the time of writing) for the domain from zone.ee. Cloudflare Pages is completely free to run for my needs and the page build is automated on every git commit to my master branch.
Next Steps
I would like to see if I could integrate the Prose editor or another git-based CRM as a simplified interface to write my blogs. Unfortunately at the time of writing, the web interface for Prose is down due to some issues with Gatekeeper.
Another feature to add is comments. Since the site is new and small, I do not think it is needed yet and social media posts capture commentary well. Comments also go against the simplicity principle of the site as it would add Javascript and backend dependencies. One possibility I am looking into is adding giscus for GitHub Discussions-based comments, but that would require making the repository public and tying the site to Github. More consideration will have to be done as this site grows.
I am also looking into the possibility of adding a build step to compress and reformat the images. This would help reduce transfer times and improve compatibility with newer formats such as JPEG XL and AVIF.
-
The opinions I have posted are my own and do not reflect those of my employer. ↩